
How We Install an Epoxy Garage Floor in Albany, Oregon
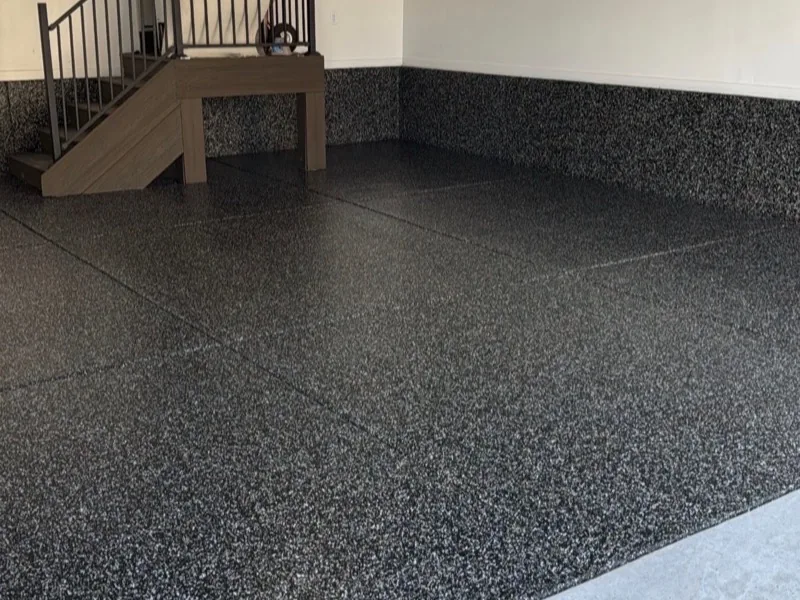
Quick answer: An Albany Epoxy installation runs in nine steps: free estimate, moisture check, clearing and masking, diamond grinding, crack repair, base coat, flake (or metallic), clear topcoat, then cure and walkthrough. Most one- to three-car garages take one to three days on site. Grinding and moisture checks are what make the floor last. Call (541) 960-4797 to start with a free on-site estimate.
Step 1: Free on-site estimate
Estimate and scope
We visit, measure the area, inspect for cracks, oil, old coatings and moisture signs, and check how much sun the floor gets. We show color samples under your garage lighting and explain systems. You receive a written scope listing prep, products, timing and warranty terms. Nothing is priced from a photo alone; see the cost guide for what moves the number.
Step 2: Moisture check
Test and plan
Oregon slabs are often damp. We look for efflorescence, staining and door-seal leaks, do a plastic-sheet check or formal testing where warranted, and plan a moisture-mitigating primer or source repair if needed. This is the step that separates floors that last from floors that blister; see the wet-climate guide.
Step 3: Clear the space and protect the house
Setup
You empty the garage. We mask door frames, walls, water heaters and the house door, and set up dust extraction. In cool, damp weather we bring heat and ventilation so the slab and air stay in the product's range.
Step 4: Diamond grinding
Profile the concrete
Planetary diamond grinders connected to HEPA-type dust extractors remove laitance, old sealers and paint, and open the pores so the coating bonds mechanically. Edges and corners are ground by hand. Acid etching, by contrast, gives a weaker, inconsistent profile, which is one reason kits fail.
Step 5: Repair cracks, spalls and joints
Make the slab sound
Cracks and spalls are filled with fast-setting repair material and ground flush. Control joints are detailed rather than bridged blindly, and active movement is noted honestly. On older Albany slabs, patches and hairline cracks are common and manageable when handled at this stage.
Step 6: Primer and base coat
Bond and body
A pigmented epoxy base coat, over a primer where the slab calls for one, goes down in a controlled thickness. The color you chose sets the tone for the flakes or metallic pigments.
Step 7: Flake broadcast or metallic
The decorative layer
While the base is wet, flakes are broadcast by hand until the surface is fully covered (see flake floors). For metallic floors, pigments are worked through the resin to form the pattern.
Step 8: Scrape, vacuum and topcoat
Lock it in
Once the base has set, excess flake is scraped and vacuumed off. One or two clear topcoats seal the floor and provide chemical, scratch and hot-tire resistance. Where sun reaches the slab, a UV-stable polyaspartic topcoat is used; see polyaspartic vs epoxy.
Step 9: Cure and final walkthrough
Handover
We give you written times for foot traffic, light use and parking, walk the floor with you, and explain care. Typical timeline: one to three days on site, with vehicles back after the cure window. Warranty terms are written per contract; the framework is on prep & warranty.
Timeline at a glance
| Stage | Typical timing |
|---|---|
| Estimate visit | Short on-site visit; written scope to follow |
| Grind, repair, base coat, flake | Day 1 (larger or repair-heavy floors take longer) |
| Topcoat | Day 1–2 depending on system |
| Light foot traffic | Usually next day |
| Vehicles back | After the written cure time (system- and temperature-dependent) |
These are typical, not guarantees; weather, slab temperature and product all affect timing.
Frequently asked questions
How long does the install take?
Most one- to three-car garages take one to three days on site. Repairs, metallic finishes and larger floors can add time.
Is the grinding dusty?
We use grinders connected to dust extractors, which capture most of the dust, and we mask the house door. Some fine dust is unavoidable.
Do I need to be home?
Ideally for the start and final walkthrough. Many owners arrange access with a lockbox or neighbor.
What if it rains during the job?
Rain itself outside is not the issue; humidity, slab temperature and water entering the garage are. We plan around them and reschedule if conditions are marginal.
Related pages
Ready for a straight answer on your floor? Call or text (541) 960-4797 or send the quote form for a free on-site estimate.
Call (541) 960-4797